PLA (Polylactic Acid) has become one of the most widely used bioplastics in the world. Derived from renewable resources such as corn starch or sugarcane, it is valued for being biodegradable, compostable, and eco-friendly. Today, PLA is commonly used in packaging, disposable utensils, and especially in 3D printing filaments.
Most PLA available on the market is produced in industrial facilities under strict conditions, but many DIY enthusiasts, students, and sustainability advocates often ask: “How to make PLA plastic at home?”
This article will guide you through the fundamentals of PLA, its advantages and limitations when produced at home, the tools and materials you will need, and the steps involved in experimenting with PLA-making in small-scale settings.
1. What is PLA?
PLA stands for Polylactic Acid, a thermoplastic aliphatic polyester obtained primarily from fermented plant-based sugars. Unlike petroleum-based plastics, PLA is made from renewable biomass, making it one of the most promising alternatives in the movement toward sustainable plastics.
PLA is produced by fermenting starch from crops like corn, sugarcane, or cassava into lactic acid, which is then polymerized to create long-chain molecules. The result is a bioplastic that shares many mechanical properties with conventional plastics but with the added benefit of biodegradability under the right conditions.
According to a report by Precedence Research, the global PLA market size was calculated at 968.74 million USD in 2024, and is predicted to increase from 1,121.69 million USD in 2025 to approximately 3,864.79 million USD by 2034, expanding at a CAGR of 14.73% from 2025 to 2034. This figure is driven by demand for sustainable materials in packaging, textiles, and consumer goods.
2. Why Should You Make PLA Plastic At Home?
2.1. Educational Value
Making PLA at home allows students, teachers, and researchers to explore polymer chemistry and bioplastic production firsthand. It transforms abstract concepts into real-world experiments. For example, a high school science fair project could demonstrate the fermentation of starch into lactic acid and then its conversion into a bioplastic.
2.2. DIY and Sustainability Projects
For eco-conscious hobbyists, experimenting with PLA provides an opportunity to create small eco-friendly items at home. These can range from biodegradable utensils to thin films for wrapping.
2.3. Hands-On Learning About Sustainability
By attempting PLA production, learners gain a deeper appreciation of the complexity of making plastics sustainable and why industrial production requires advanced processes.

Why Should You Make PLA Plastic At Home?
3. How To Make PLA Plastic At Home
While industrial PLA production involves large-scale fermentation tanks and advanced polymerization reactors, you can replicate a simplified version at home. Remember: the purpose here is educational. You won’t achieve industrial-quality PLA, but you’ll better understand the process.
3.1. Use Cornstarch and Vinegar
Step 1. Preparation
You'll need the following ingredients to make plastic at home:
- 1.5g cornstarch
- 10 ml distilled water
- 1 ml of white vinegar
- 0.5-1.5g glycerol or glycerine
- 1-2 drops food coloring
Step 2. Create a mixture
Mix all of the above ingredients together in a saucepan and use a spatula to stir it. Do it until there are no lumps in the mixture. After mixing well, you should see a milky white color liquid, which is quite watery.
Step 3. Heat the mixture
Put the saucepan on the stove and heat at a medium-low level. Keep stirring while it is being boiled. You'll see the solution becomes more translucent and thick.
After heating for 10 to 15 minutes, or when the mixture is clear and thick, remove it from the stove. Note that there may be lumps if you overheat. You can add 1-2 drops of food coloring to get the desired plastic color.
Step 4. Spread the mixture onto foil or parchment paper
Pour the solution on a piece of foil or parchment paper, remove any bubbles by using a toothpick, and then let it dry. If you want a molded plastic, you should do it when the mixture is still warm. We'll explain the details in the section below!
Step 5. Drying time
Let the plastic dry and become harder for at least two days. The drying speed depends on how thick the plastic is. The thicker, the longer. Leave the result in a cool and dry place and check if it's hard enough after 2 days.
3.2. Use Gelatin or Agar
Step 1. PreparationThe list of ingredients includes:
- 12g (4 tsp) gelatin
- 3g (½ tsp) glycerol or glycerine
- 60ml (¼ cup) hot water
- Food coloring (optional)
Note: You can replace gelatin with agar, a substance derived from algae, to make a vegan-friendly bioplastic.
Step 2. Combine the ingredients
Put all the ingredients in a saucepan, put it on a stove, and set medium-high heat. Use a whisk to stir until there's no lump. Add a few drops of food coloring to get the color you want.
Step 3. Heat the mixture until it froths
Continuously stir the solution inside the saucepan until you see it starts to froth. Or you can use a thermometer to check if the mixture reaches 95°C (203°F). Remove the saucepan when you see either one of the two signs. Note that if the mixture begins to froth before reaching 95°C, it's ok.
Step 4. Pour the solution
Before pouring the mixture out, you need to remove excessive froth with a spoon and stir to remove lumps. Then, pour it out onto a smooth surface. Cover the surface with foil or parchment paper so you can remove the plastic easily.
Molding into shape should be done in this step, which we'll mention in the next method below.
Step 5. Drying time
It will take around 2 days for the plastic to dry, depending on the thickness of the piece. The best way is to let it dry naturally, yet you can fasten the process by using a blow dryer.
3.3. Mold the Bioplastic
Step 1. Get a mold
You can buy a mold at any local craft or hobby shop. A cookie cutter is also an alternative to cut shapes out of plastic while it is still warm. Or you can try to create a mold yourself by sculpting two pieces of clay around the object in which you want the plastic to be shaped. Let the clay dry, remove the two pieces, and you'll have your mold with the desired shape.
Step 2. Pour the hot plastic mixture into the mold.
Before pouring, use a non-stick spray to coat the mold so it will be easier for you to remove the object later. Pour the mixture done by one of the 2 methods above into the mold. Tap the mold on the counter to pop the bubbles, if any.
Step 3. Drying time
You need to wait at least 2 days for the plastic to be dry. If you check it after 2 days and it's still wet, wait for another day to let it fully dry. The thicker, the longer time you will need.
Step 4. Remove the plastic
Once it's dry enough and fully hardened, you can remove the plastic from the mold.
4. Applications of Homemade PLA Plastic
Homemade PLA isn’t strong enough for industrial use, but it has meaningful applications in learning and creative projects. Students and educators can use it to demonstrate how biodegradable plastics are made and compare the texture, flexibility, and decomposition rate of PLA with petroleum-based plastics. It’s also useful in sustainability workshops or school science fairs where participants explore the environmental advantages of bio-based materials.
For hobbyists, PLA resin can be used to make decorative crafts, simple household items like coasters or keychains, or even small-scale prototypes. These projects show that sustainable materials can be functional and creative, inspiring new ways to reduce reliance on traditional plastics.
However, homemade PLA should not be used for items intended for food contact or long-term use. The material’s lower strength and unpredictable quality mean it’s best suited for educational and experimental purposes rather than practical applications.
5. Safety Considerations When Making PLA
Working with PLA involves both chemical and thermal processes, so safety should always come first. Lactic acid, while naturally derived, can irritate the skin and eyes. You should wear gloves, protective eyewear, and an apron during the experiment.
Proper ventilation is also essential, as heating lactic acid may release mild fumes. Conduct your experiment near an open window or under a ventilation hood, and keep children or pets away from the workspace. When heating mixtures, monitor the temperature carefully — overheating can cause degradation or burns.
Waste disposal should be handled responsibly. PLA scraps can be safely discarded with regular household waste or composted at industrial composting facilities. Never pour concentrated acids down the drain; neutralize them first using baking soda before disposal. Following these precautions ensures your experiment remains both safe and environmentally responsible.
6. EuroPlas - Where you can Find an Eco-Friendly Solution for Your Business
As one of the leaders in the masterbatch world, EuroPlas always makes clients satisfied with the product's quality and service. We always listen and customize our materials according to the end product's requirements. Besides, we understand the concern of our customers about green materials for sustainable development and a healthy environment. Therefore, we've come up with a list of EuroPlas bioplastic compound and Bio Filler to benefit your business and environment.
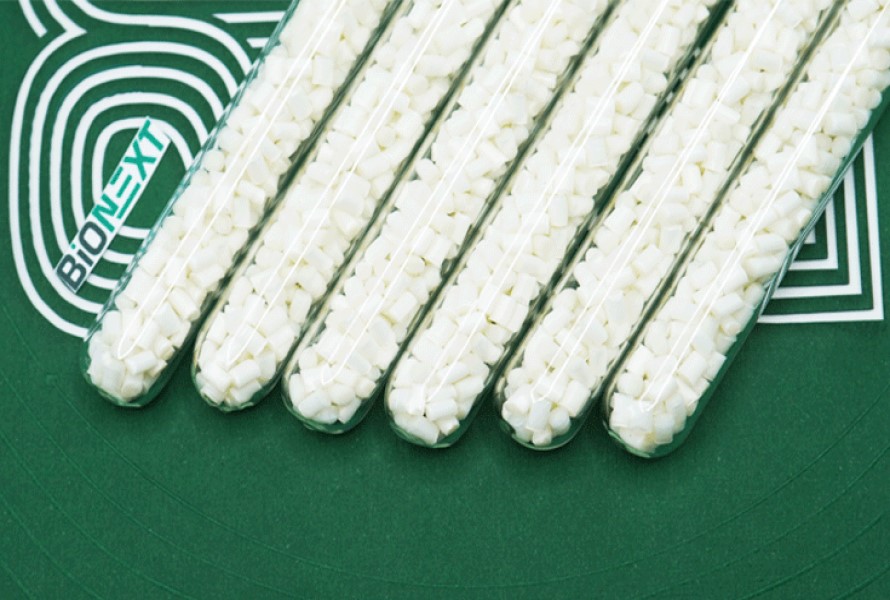
The bioplastic compound BioNEXT is exclusively developed by EuroPlas. It can be decomposable within 12 months after use. You can apply it to various aspects, including automotive & transport, construction, fibers, electronics, household appliances, and especially food packaging. EuroPlas guarantees that the end product passes strict quality control management to meet all the requirements.
If you're looking for a cost-effective material solution for bioplastic products, you should not skip our biodegradable product line, Bio Filler. It can help increase the final product's glossiness, transparency, and stiffness. Besides, it also acts as an anti-block and slipping agent in blown film.